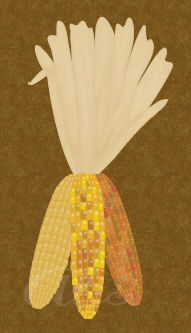
Gradient Highlight on Indian Corn

Indian Corn

I posted the indian corn shown above in a PSP forum that I belong to. I used my own white gradient fill to create the highlite effect on the indian corn pieces. I was very pleased with the results from my gradient as it not only highlited each piece of corn but added a nice roundness. Saved me the teadious chore of highlighting each piece of corn individually.

My white gradient     download gradient here

I used separate square vectors for each piece of corn and then grouped the corn rows together in the PSP file.
So when you open the indian corn vector file leave the corn rows grouped.
I suggest you apply the white gradient highlite before you move on to change the colors of the corn pieces.

Basically I duplicated the corn row layer. Then on the duplicated layer I changed the vector properties to No Stroke and Sunburst Gradient Fill. It's alot easier to apply the gradient fill while the little corn squares
are all "grouped" because they all change at one time -- quick and easy.

Here are the steps I took to apply the white gradient highlite:

STEP 1: Duplicate layer named "rows corn middle".
End results should be a layer named "copy of rows corn middle".
Rename the duplicate layer to "highlite rows corn middle".

STEP 2: Still on the layer "highlite rows corn middle" -- Right mouse on vector group -- then choose Properties from popup menu. Uncheck "Stroke Fill" to turn the stroke off. Change fill from a solid color to a "Gradient Fill".

Choose "ac_highlite" gradient. Angle=0, Repeat=0, Invert off unchecked. From the gradient style row choose the Sunburst style which is a circle style.

Several magazine articles recommended the highlite at the 1 o'clock position so this is what I used.
Change the gradient center point
Horizontal = 56
Vertical = 23

All done. Experiment with the layer opacity on the highlite. I set my highlite layer opacity to 50.


webpage design by Alice Crane 18 September 2004            http://picnicalice.com